Review the part 2
Last time we launched our 'Hello, World!' application. We used vue-cli for initialization and launched it with the npm server which, is an inbuilt tool.
Review the snippet.
The constructor function we passed into the main.js contained two important parts. The first one is the el , property which refers to the HTML element where our root scope will exist. We could have used CSS selector too, but we decided to mount the Vue instance through the id attribute. The second important part is the data object. Data object helps Vue in the information management. So we defined a message property in the data object, and we declared the message property at the template level. When we started the server and Vue began compiling (This is a process with several steps, and we call it lifecycle hooks. You can check it here.), the template variable interpolated, or we can say the compiler replaced it. So the value we had assigned in the data section of the message property changed. This process does our work so easy because anytime we change the value the framework will re-render the output.
Options
In the example code, we have seen only two items from the available options. However, there are many others. In the following section, I am going to present few essential with some explanation, but the list is not full at all.
data:
- The data object for the Vue instance must be a plain object. A rule of thumb is the data should just be data - it is not recommended to observe objects with its stateful behavior. Once observed, you can no longer add reactive properties to the root data object. It is therefore advised to declare all root-level reactive properties up front, before creating the instance.
- Important to note:
- Vue cannot detect object property addition or deletion. Vue performs the getter/setter conversion process during instance initialization. The property must be present in the data object for Vue to convert it and make it reactive. The reason of this Object.Observe became obsolete.
props:
- A list/hash of attributes that are exposed to accept data from the parent component. It has a simple Array-based syntax and an alternative Object-based syntax that allows advanced configurations such as type checking, custom validation, and default values.
- A list/hash of attributes that are exposed to accept data from the parent component. It has a simple Array-based syntax and an alternative Object-based syntax that allows advanced configurations such as type checking, custom validation, and default values.
propsData:
- Unit testing purposes.
- Unit testing purposes.
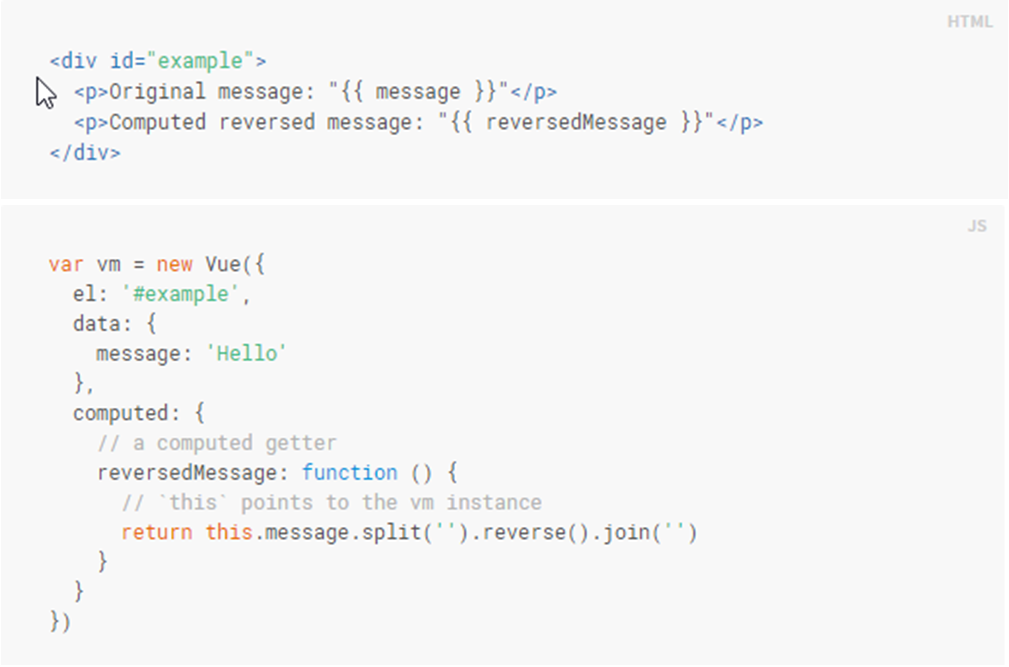
computed:
- Computed properties are cached based on their dependencies.
- A computed property will only be re-evaluated when some of its dependencies have changed.
- The purpose of the property to avoid template bloating like this.
- Computed properties are cached based on their dependencies.
The good approach:
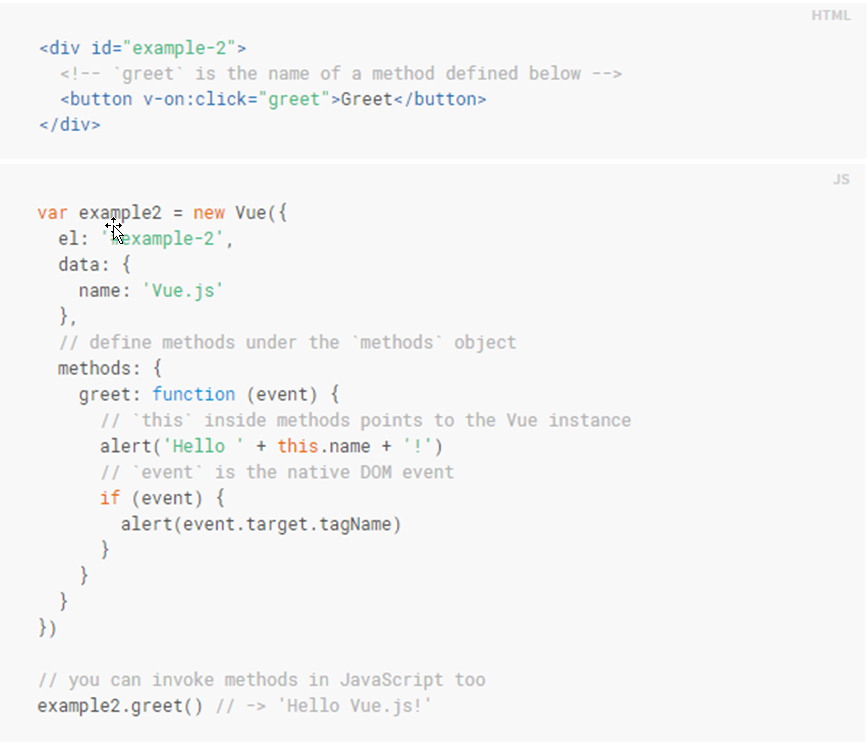
- methods:
- In order to avoid complex functionalities in the template level, we can call methods eg.: with the v-on event handler.
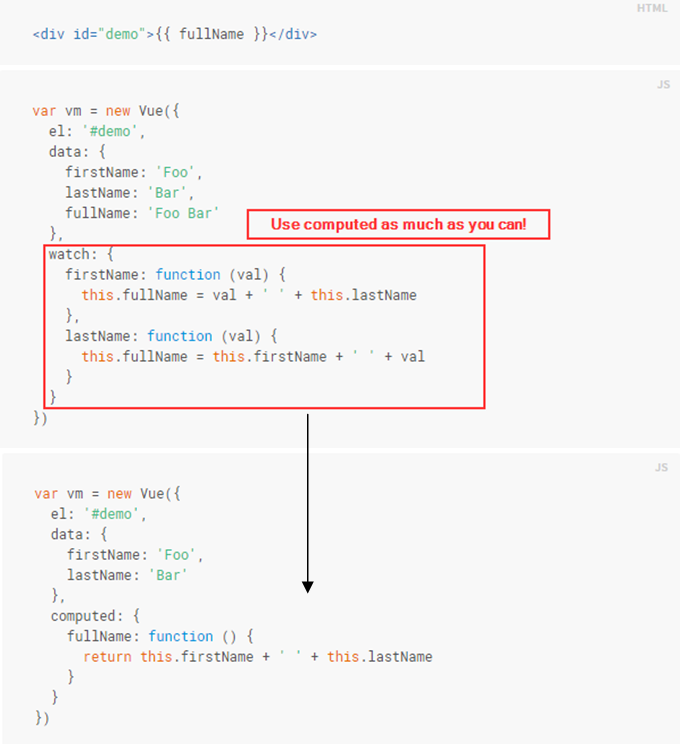
- watch:
- Watching changes of an expression ( eg. in a computed function ) when Vue changes the values. Overusing watch is not the best approach. Sometimes it can be useful, but it is much better to use the computed property of the component. In this example below, you will see that we can get the same result with a watch, but it is closer to an imperative strategy compare to the declarative computed solution.
Template language
Variables, loops, and conditions are one of the most basic building blocks of a programming language and a template language. As we have seen in the example, we inserted the message property with curly brackets inside the div which had the #app id. We used double curly brackets to warn Vue to interpolate the value of that property.
Vue is using a "Mustache" syntax. If you are familiar with other template languages, it is not difficult to learn it and get used to it. It is important to mention that Vue template language uses the Virtual DOM concept so we could write native JavaScript render function and use it directly without the template. But we will go with the template in the next part of the series. Until next time have fun with Vue guys!


